


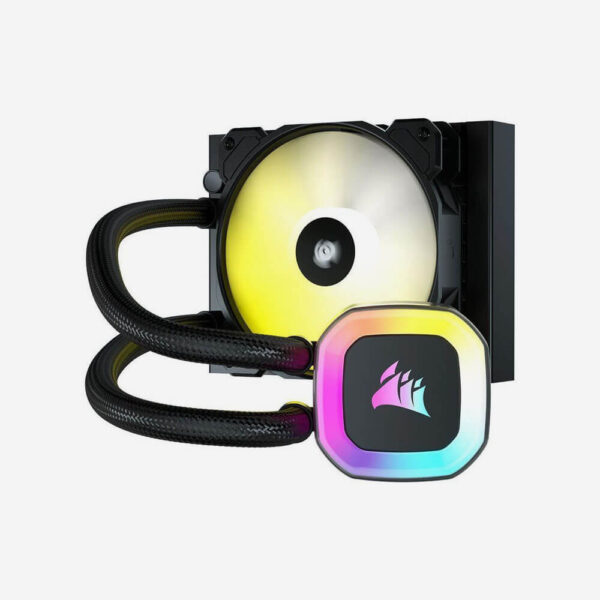


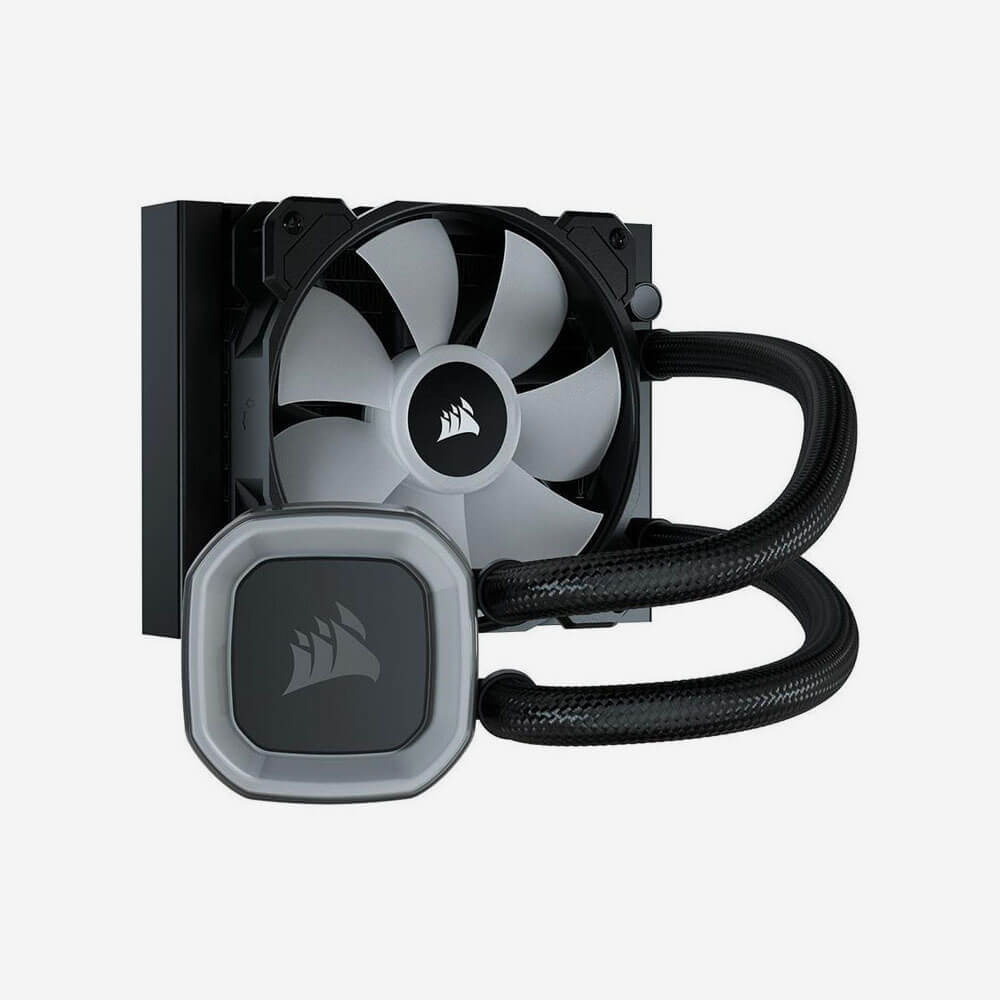
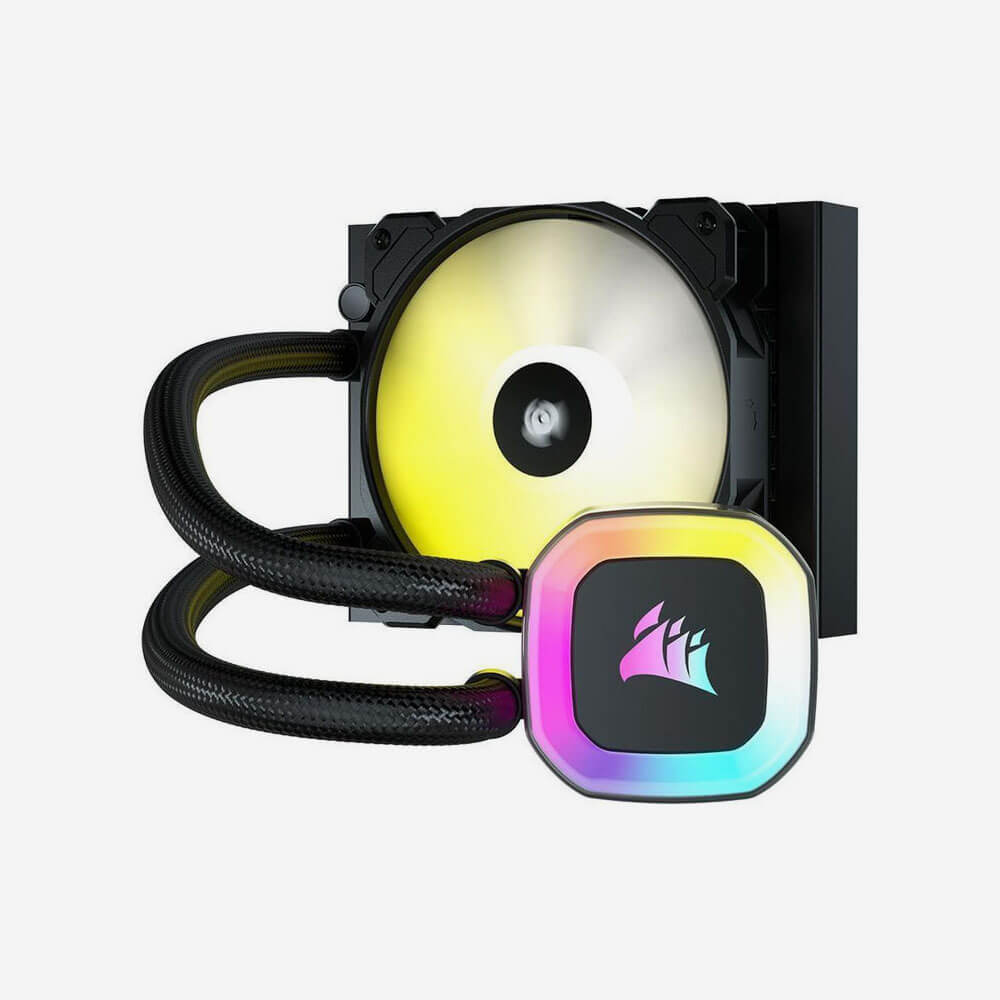


Corsair H55 RGB CPU Cooler
$99.00
Duis aute irure dolor in reprehenderit in voluptate velit esse cillum dolore eu fugiat nulla pariatur. Excepteur sint occaecat cupidatat non. Duis aute irure dolor in reprehenderit in voluptate velit esse cillum dolore eu fugiat nulla pariatur.
[alpus_aprs_ai_summary]
- Description
- Reviews (10)
- Store Policies
- Inquiries
Description
Purus lobortis senectus faucibus imperdiet rutrum porttitor tincidunt laoreet parturient consectetur rtor ad adipiscing id a duis hendrerit diam. A at nec rutrum nam molestie suspendisse scelerisque pl tea a ut commodo volutpat ullamcorper penatibus dis quis felis justo porta montes nam a vestibulum tristique parturient parturient eget tincidunt. Semper dui.
Ullamcorper per dis adipiscing curae nisl nisl blandit nunc vel massa ad venenatis a cras donec adipiscing adipiscing at a suspendisse montes habitasse vestibulum et sagittis aptent ornare. Purus nostrorci nascetur ante aenean parturient nullam conubia parturient a porta felis.
- Faucibus imperdiet rutrum porttitor tincidunt laoreet parturient consectetur to
- Volutpat ullamcorper penatibus dis quis felis justo porta montes nam
- Scelerisque leo fusce dui parturient ad a penatibus mauris adipiscing tempus
Purus lobortis senectus faucibus imperdiet rutrum porttitor tincidunt laoreet parturient consectetur tortor ad adipiscing id a duis hendrerit diam. A at nec rutrum nam molestie.
Services
A at nec rutrum nam molestie suspendisse scelerisque platea a ut commodo volutpat ullamcorper penatibus dis quis felis justo porta montes nam a vestibulum tristique parturient parturient.
Free Shipping & Returns
Free shipping on all orders over $99.
Money Back Guarantee
100% money back guarantee.


Duis aute irure dolor in reprehenderit in voluptate velit esse cillum dolore eu fugiat nulla pariat Excepteur sint occaecat cupidatat non. Duis aute irure dolor in reprehenderit in voluptate velit se cillum dolore eu fugiat nulla pariatur. Purus lobortis arturient consecrtor ad adipiscing id a duis hendrerit diam. A at nec rutrum nam molestie.
Product Details
A at nec rutrum nam molestie suspendisse scelerisque platea a ut commodo volutpat ullamc penatibus dis quis felis justo porta montes nam a vestibulum tristique parturient.Scelerisque a vulputate varius duis a purus nam integer lacus ridiculus ullamcorper nec ac convallis mus hac parturient hendrerit erat a aliquam amet. Cras duis aliquet a cras hendrerit
- At habitant amet erat gravida lectus dapibus parturient per
- Etiam per habitant dis condimentum vestibulum augue vivamus massa ullamcorpe
- Adipiscing scelerisque mi parturient nostra urna non.Iaculis
- At habitant amet erat gravida lectus dapibus parturient per
- Habitant dis condimentum vestibulum augue vivamus massa ullamcorper
- Adipiscing scelerisque mi parturient nostra urna non.Iaculis
Purus lobortis senectus faucibus imperdiet rutrum porttitor tincidunt laoreet parturient consecrtor ad adipiscing id a duis hendrerit diam. A at nec rutrum nam molestie .
10 reviews for Corsair H55 RGB CPU Cooler
Add a review
General Inquiries
There are no inquiries yet.


Joe Doe –
This is a review of the CORSAIR Hydro Series H100i v2 AIO Liquid CPU Cooler, 240mm Radiator.
I used the Corsair H100i v2 cooler in my new gaming computer. This is the third computer I have built with an H100 series cooler. I built my new computer with the ASUS Maximus XI Hero motherboard in a Corsair 330R case with an Intel i7 8700K (overclocking) processor, 16 GB of Corsair DDR4 memory, and a Corsair AX860 power supply.
Pick the Right Case! Tragically, my choice of the Corsair 330R case was a big mistake. The “Specifications” for the case on the Corsair website specifically list the Corsair H100i CPU cooler as being compatible with this case, but it is NOT. The 330R simply does not have enough “head room” at the top of the case to install the H100i v2 without interfering with: (1) the CPU power cables; (2) the rear exhaust fan; and (3) the top optical-drive bay. So be warned: Check your case’s Specifications, of course, but also do some web-searching to see if anyone had problems installing the H100i v2 in your chosen case.
When considering the H100i v2, make sure to visit the Corsair website and look through the Specifications and the “Quick Start Guide” (which you can download as a PDF file). Also, if you have never installed one of these coolers, there are some very helpful “How To” videos available on YouTube.
Con: The “stock” fans are quite loud at full speed.
Basic Steps to Install (but always follow the current “Quick Start Guide”):
Note: I installed my H100i v2 in the top of the case. You could also install it in the front or the bottom, if your case is designed for such installations.
1. Open box and inventory all parts (to make sure you got everything).
2. Inspect to make sure it is new and has no obvious defects. For example, there should be a thin, smooth, unblemished layer of thermal paste on the base plate of the pump unit. If it is missing or scratched or blemished, it might not be new.
Note: The next part works well if you have the computer standing up, instead of laying flat.
3. Locate the 4 standoff screws you will use to secure the backplate. For an Intel 1151 socket, they will be the ones with equal-length threads on both ends.
4. At the back of the motherboard partition plate, position the backplate. For an Intel 1151 socket, the sliding bits will be toward the inside. Hold the backplate in place with one hand.
5. While holding the backplate with one hand, pick up a standoff screw and thread it into the backplate. Do not tighten; just thread it loosely but enough not to fall off. Thread another standoff screw diagonally opposite of the first one. Thread the remain 2 standoff screws. Now finger-tighten all screws (don’t force them).
6. Connect the two 120 mm fans to the radiator with the long screws. You must decide if you want the fans to be blowing air into the case or exhausting air out of the case. There is a small arrow on the fan’s casing showing direction of flow. Of course, make sure both fans are blowing in the same direction. I orient the fans so their cables are both at the center.
Note: The Corsair “Quick Start Guide” points out that best cooling performance is achieved if fans are mounted to blow outside air into the case. I always use the CPU cooler as an exhaust. This means hotter air is being blown into the radiator; but I have never had any problems cooling the CPU with this configuration.
Note: The next part works well if you have the computer laying flat, instead of standing up. A second person may make the next steps easier (or harder, depending on the person).
Suggestion: If you are working in a small case will little extra “top room” above the motherboard, then I highly recommend that you make connections to your motherboard before installing the radiator (for example, CPU power cable(s), connections to optical drives if at top of case, etc.).
7. Get the 8 short screws you need. Position radiator against inside of case (at top of case, in my build). While holding radiator in place, secure radiator to the case with the short screws, which are inserted from the outside of the case. Suggest that you do not fully tighten any screw until all 8 screws are inserted.
8. Connect the pump unit to the CPU. This is where you should really watch a YouTube video first. Two things: (1) Thermal paste should already be applied to the pump’s heat transfer plate, so you do not need to apply more thermal paste; (2) you need to hold the pump unit firmly flat against the CPU the entire time you are securing it with the 4 threaded nuts; (3) nuts should be finger-tight, do not use screw driver and over-tighten; (4) loosely attach the 4 nuts at first, then tighten (in stages) the 1st one, then the opposite one, then the remaining two. You do not want the plate rubbing or tilting during this process. It might be best for one person to focus on holding the pump flat (evenly touching the CPU) while another person secures the nuts.
Note: While you do not need thermal paste if all goes well, you might want to have a tube handy just in case things don’t go exactly right the first time. I you need to try a second time, you should remove all thermal paste from both the CPU top and the pump bottom with isopopal alchohol (I use alcholol wipes, like for sterilizing arms before giving a shot).
9. Corsair’s “Quick Start Guide” states that pump power should be connected to CPU_FAN and the 2 cables from the radiator’s fans should be connected to the 2 connectors coming off the pump. If you connect the pump power to CPU_FAN (and the 2 fans to the pump cables), then go into BIOS and make sure that the fan profile for CPU_FAN is always at 12 vdc (maximum) at all temperatures.
Note: My motherboard’s installation guide would have the H100i v2 the pump connected to AIO_PUMP and 2 fans connected to CPU_FAN and CPU_OPT on the motherboard. I chose to follow the Corsair “Quick Start Guide” and connected the pump to CPU_FAN and the 2 fans to the pump. This configuration has the fans controlled on pump temperature (a more direct indicator of radiator demand) rather than motherboard temperature.
10. (Optional) If you like you may connect the H100i v2 to a USB port. Just connect the little connector to the pump and the bigger connector to a USB 2.0 socket on your motherboard. You need this USB connection if you want to use the Corsair Link software for system monitoring.
11. (Optional) Install the Corsair Link software. You can download it from the H100i v2 product page on the Corsair website. This nifty utility allows you to monitor temperatures as well as pump and fan status. For example, it displays: (1) H100i v2 temperature, pump speed, and fan speeds; (2) Motherboard temperatures (7 sensors, in my case); (3) CPU temperatures (separate indication for each “core”); (4) Video card temperature and fan speed.
In conclusion: The H100i v2 is a fine product. I have used previous models of the H100 series in the past and they have lasted for years without any problems. From time to time I will stress-test my system while watching temperatures, just to make sure everything is still operating okay.
Joe Doe –
so I guess it’s time. They are mixing all of their Corsair water cooler reviews together, which is not good because people won’t know if they’re actually reading a review of the product they’re wanting or a completely different product, so to anyone reading this, this is a review of the H100i v2 240mm.
First a quick review of the seller PCRush Outlet in case that’s who is selling it when you’re looking to purchase.
~ 5 stars for shipping. It shipped the next day after ordering.
~ 0 stars for packaging. The cooler was shipped inside a box three times larger with ZERO packaging. No bubble strips, no bubble wrap, no peanuts, no paper. Nothing. Just free to bounce around all the way from them to me. I’m surprised it worked and wasn’t leaking when I got it.
The TL:DR is at the bottom in case you don’t want to bother with the entire review.
OK now the review.
This thing is pretty straightforward to install but unfortunately what should have been simple turned into a headache. I was one of MANY that have the “backplate not secure on some Intel boards” problem. Apparently this problem has been going on for YEARS on many of the models of Corsair coolers and they still refuse to admit that there’s a problem. The problem is that the backplate, when securely fastened, is still not tightly secured against the back of the board. Corsair says that this is normal and that after attaching and tightening the top it will pull the backplate in and tighten it as well. Unfortunately, I was one of many that this was simply not the case. After tightening the top I could still pull the cooling plate off of the CPU because the backplate was not tight against the back of the board.
So I did what the other forum posters and YouTube videos advised: I went the next day and got some rubber washers to put between the backplate and the board. Now, I had over 5mm of give on my backplate so it was very loose. If you only have 1 or 2mm of give you might not need washers which I’ll explain why in a sec. The washers I used are 5/32 x 3/8 x 1/16 and this was on an Asus Z87 Pro. The size you will need will differ based on the thickness of your board and the amount of play you still have after it’s been secured to the back of the board. That size washer is what I needed with play of at least 5mm on my board and they worked perfectly.
After I attached the plate using the washers I still had 1-2mm of play which concerned me. I wasn’t sure if I should put on an additional thin washer or not but decided to try it as it was. This time after tightening the cooling plate over the CPU it did pull the back in and tighten it as well. So if you only have 1-2mm of give after you’ve tightened your backplate you’re probably good to go without washers. If you have between 3-4mm of give you may or may not need washers. If you have 5mm+ of give you’re gonna need washers. The bad thing about putting it on before you know if you need washers or not is you mess up the pre-applied thermal paste which is very nice and not just some generic paste. So hopefully you can use this as a guide to see if you’ll need washers or not before putting the top on.
After I got through that headache the rest was easy. Put the fans on the radiator and attach the radiator to the case (Actually I inserted the radiator and fans before attaching the cooling plate over the CPU but anyway…). The instructions call for the fans to be used in a pull config for the best results. If you have an air intake on the bottom of your case and room for the radiator that might work well. Mine is mounted in the top of my case and since heat rises I felt it needed to be in a push config and also to work with the airflow of my case. So I have 2-120mm fans on the bottom of the radiator in push config and 1-240mm on top of the radiator in pull config. It works wonderfully.
Now for the temps. I’m running an i7 4771 at 3.9. The lowest I’ve seen is 21 degrees which was 3 degrees below room temp. The highest I’ve seen is 55 degrees. The 55 degrees was after running all 8 cores at 100% at 3.9 for four hours. Even still it appears to have just been a spike because it was hovering in the mid to upper 40’s. It likely hit 50 degrees, kicked the fans up higher, then maintained in the 40’s. So this thing cools like a beast.
The fans are not loud really because, so far for me, they haven’t really needed to spin up in order to keep things cool. If you’re overclocking like mad then yeah they’re gonna run faster and be louder. At max they are very loud. Also one thing I’ve found in the Corsair Link software is that the fan speeds DO NOT scale with the temperature. For example the fan speed is 40% at 20 degrees. If you set it to be 50% at 30 degrees it’s not going to be 45% at 25 degrees. It’s going to be 40% all the way until it hits 30 degrees and the same for every step above that. So I recommend creating a custom profile with adjacent steps no larger than 5 degrees apart. That’s a shame too my EVGA software for my video card raises the fan speed 2% for every single degree rise in temp. That’s how it should work.
Also I noticed in at least two different places in the instructions that the picture of the item was correct but the letter used to describe which part it was was not correct. So look at the pictures not the letters.
TL:DR
So that’s about it unless I can think of something else later. This is a great cooler that gives excellent temps but it must be installed properly and Corsair’s version of properly isn’t always correct. If there’s any give at all after you’ve tightened the backplate and the cooling plate over the CPU then you need washers.
Joe Doe –
I think the product is fine, I think the company is fine as well. Everything mounted to just fine and wiring to my PC was no more than 2-3 minutes. My only complaint is that it was missing an AMD CPU pump mount which I had to go an order for like $14. Not too big of a deal but a little bit of a headache considering it was supposed to be in the box, so maybe it wasn’t double checked or whatnot. Not too big of a deal again, and the product works fine too.
Joe Doe –
I mostly use my PC for playing VR games, and the CPU temps were getting really up there when playing for an extended amount of time, like 95°-100° C with just a standard air cooler. After switching to this AIO liquid cooler, my CPU temps hover around 50° C and didn’t get any higher than 60° C under the most sustained workloads. I have a very small PC case, a SilverStone SG13 and I was able to fit the AIO cooler with the radiator and CPU mount with no issues!
Joe Doe –
Bought this as I was having issues with a DeepCool AIO not cooling my cpu down and letting it hit 212, decided to test this guy out to narrow down my problems… soon as this bad boy went in, in games not a temp over 109F. Way better cooling on this guy. RGB is easy to setup as long as you have the right amount of RGB hubs from Corsair lol, install was straight forward. I did not use pre applied paste, used Grizzly Kryonaut. (240mm aio)
EDIT: I also picked up a 120MM version of this for my fiances gaming pc as her case will only allow a 120mm on the top, it improved temps on her ryzen 7 by about 20F on idle temps and about 60F when gaming. Fantastic performance on both Corsair AIO’s I bought. Still definitely recommend.
Joe Doe –
This AIO overall works great. I had issues with the RGB on the pump at first, but later corrected that.
For your LEDs to work correctly, plug the 4pin RGB cable from the Pump into one of the 4pin slots on the ARGB adapter cable with the 3 pin end on it. Then plug that into a 5V Header on your Motherboard and it should work correctly. Make sure the 3 pin from the Pump is plugged into the CPU fan Header on your Motherboard as well so that the pump is working too.
Since this is the X series and not the i series, this requires your Motherboards software to control the Pumps RGB, make sure that you try your motherboards rgb software to get the LEDs working.
The one only issue I have is that I have to get a core XT to work the RGB within the iCue Software, but that’s not too big of a deal.
Joe Doe –
If your case fits it’s a good cooler. With a R7 3700x I used to get 40-60c fluctuations in temp since they like to turbo at idle. With the AIO I get 40c (no fluctuation) at idle and 60 at load. Coolant temp (in summer) peaks at 42c under heavy all core load.
Fans aren’t silent but if you don’t have an open air case like I use you wouldn’t hear them over your gpu.
ICUE is a good software but color accuracy in the color wheel to the pump LEDs could use some tuning. A mix of there being a slight delay from setting any fan curve or led setting would be my only complaint. At first I set the fans to “quiet” and they didn’t ramp down, I had to wait 10-15 seconds to see the rpm in the software to drop and hear a difference in speed. Not a big deal but worth mentioning. Overall no complaints
Joe Doe –
From a sale at a major computer store, I ended up buying more CPU than I bargained for at the time. I ended up with a Ryzen 9 3900X instead of the 3700X. I already had this. I fully expected to underclock and undervolt while I waited for a bigger cooler to arrive. It’s now been installed for three years. And it still does a great job with that CPU with a 4.6 GHz turbo to boot. Then again, it might help that I have a lot of room in my case. It might not fare as well in cramped quarters. But I am more than satisfied with this component.
Joe Doe –
Honestly wasn’t expecting much for a low end AIO Cooler. RGB looks decent even though that isn’t what I was looking for. Took my cpu temps from a regular cooler from 70-80°C to 40-50°C and i’m running a ryzen 5 5600x with a Phanteks case with the no airflow.
Joe Doe –
I generally like to get the most out of the things I use, especially the products I use the most during my usual day. A good majority of the computers I have used throughout the years have used a single method of cooling; fans. I’ve noticed that most computers run relatively warmly, which is to be expected, especially with AMD brand processors. All computers have this problem, especially if they get too hot, they begin having issues due to them overheating. However, a full liquid cooled computer would be too expensive, so it would require something affordable and gives you that bang for your buck so to speak.
I’ve used stock cooling equipment before in computers for quite a while, and I needed something to help bring my performance up and make my processor more efficient. I had come across another method of cooling, AIO Liquid coolers. A cheaper method of cooling for sure, and without all the hassle of pouring liquid and checking for leaks every fifteen minutes. It sure would be an effective and cheap method to help squeeze a little more performance out of your CPU.
PRICE
Now most coolers of this type are generally around the $80-$140 range and are quite affordable compared to the price of a more typical water-cooled setup you’d see in more enthusiast grade builds. Even if you’re new to computer building or if you’re more experienced, something in a high price range would cause you to shy away from that product. I believe price is the most important when it comes to buying computer parts. Something on the cheap end might break or ware out in a short time, while something more expensive will end up not achieving a good price to performance ratio. So something in between those ranges could potentially be your best bet.
INSTALLATION
Installing shouldn’t be too much of an issue, especially if you haven’t installed an AIO Water Cooler before. This particular unit features a dual 240mm radiator and is a little tedious to install. Two hands might seem enough, however computer cases vary and some have more room than others, so installation varies. In my particular case, installation was frustrating and took longer than I would have liked. The radiator is relatively thin compared to most other Coolers. However it’s to be noted if the fans are installed inside the case, motherboard heatsinks will get in the way of the bottom screws. A angled screw driver is really recommended for that part.
AESTHETICS
With sleeved tubing and a redesigned radiator pump and radiator, this updated version of the previous h100i helps give this product are much more redefined look. I believe this redesign gives the whole product a more of a sharper look to it, some more personality so to speak. With swappable faceplates and an RGB LED light in the pump that illuminated the Corsair Sails logo and their name, really helps personalize your computer and help fit into its color scheme. It’s probably a best bet to mention that the fittings for the tubing have been relocated to the inside of the cooling block and not on the side as with the previous cooler. This helps to prevent joint breaking and keep the whole thing streamlined and professional.
PERFORMANCE
Compared to the temperatures of a stock cooler, this one blows it out of the park. With a decrease in temperature from around 60 degrees Celsius to around 20 degrees. It’s a fantastic improvement, one of which I am happy for. Switching to a water cooled component really did improve the computers performance, which had been slow performing during long run times. Although, depending on fan orientation the performance can vary slightly, or even drastically.
PROS
There are certainly many benefits to using a component of this type. With a larger area of heat dissipation, more heat can be pulled away from the processor. This particular unit comes with a large radiator which helps remove heat out from the case and doesn’t push warm air around on the inside, which further helps decrease ambient temperature. It’s a great fit, especially when it comes to keeping the things you keep precious cool. I’ve found that keeping the radiator at the top of the case and having case fans pull air from the bottom and push the air to the back of the case and then up towards the radiator really helps add for that cooling factor.
CONS
Unfortunately, as with almost every product, there will most likely be drawbacks to take note of. As mentioned previously, installation can be a bit tricky and frustrating at times. I also have noticed with the time that this cooler has been in use for my current computer, both stock fan bearing did ware out and cause noise when first powered on but they do quiet down after a little while. On another note, tubing is very stiff out of the box and is very hard to maneuver during installation and can make certain radiator positions to be a bit difficult to pull off and may cause breaking on the tubing joints and potentially causing the cooler to leak.
My choice of this particular cooler wasn’t a hard one. I’ve purchased products from Corsair before and I’ve liked their styling and build quality with many of their products. I felt this was the best choice do to its more noticeable redesign of the cooler pump, radiator, and sleeved tubing. These factors really improved the overall look of the system. Now there are other coolers that work exactly the same as this one, however if you’re looking for a more pleasing look, this is probably one to look into as it’s a one of a kind product and not many out there pull off that specific look, especially with the sleeved tubing.